Connecting your revenue integration
- Connecting your revenue integration
- Click on Data and then on Revenue & Customers via the menu on the left.
- Under Revenue integrations, click on the Connect data button.
- Select your integration by clicking on the logo, then follow the instructions on the screen for a successful connection.
If you do not use a supported subscription management tool like Stripe or Chargebee, you can upload your revenue data manually in Excel or CSV format.
Manual contracts upload
Preparing your manual contracts upload
Note: To avoid errors during the upload process, please click here and use our Excel template.
This file needs to include all contracts/subscriptions (including churned/cancelled ones) for the minimum period of the last two years.
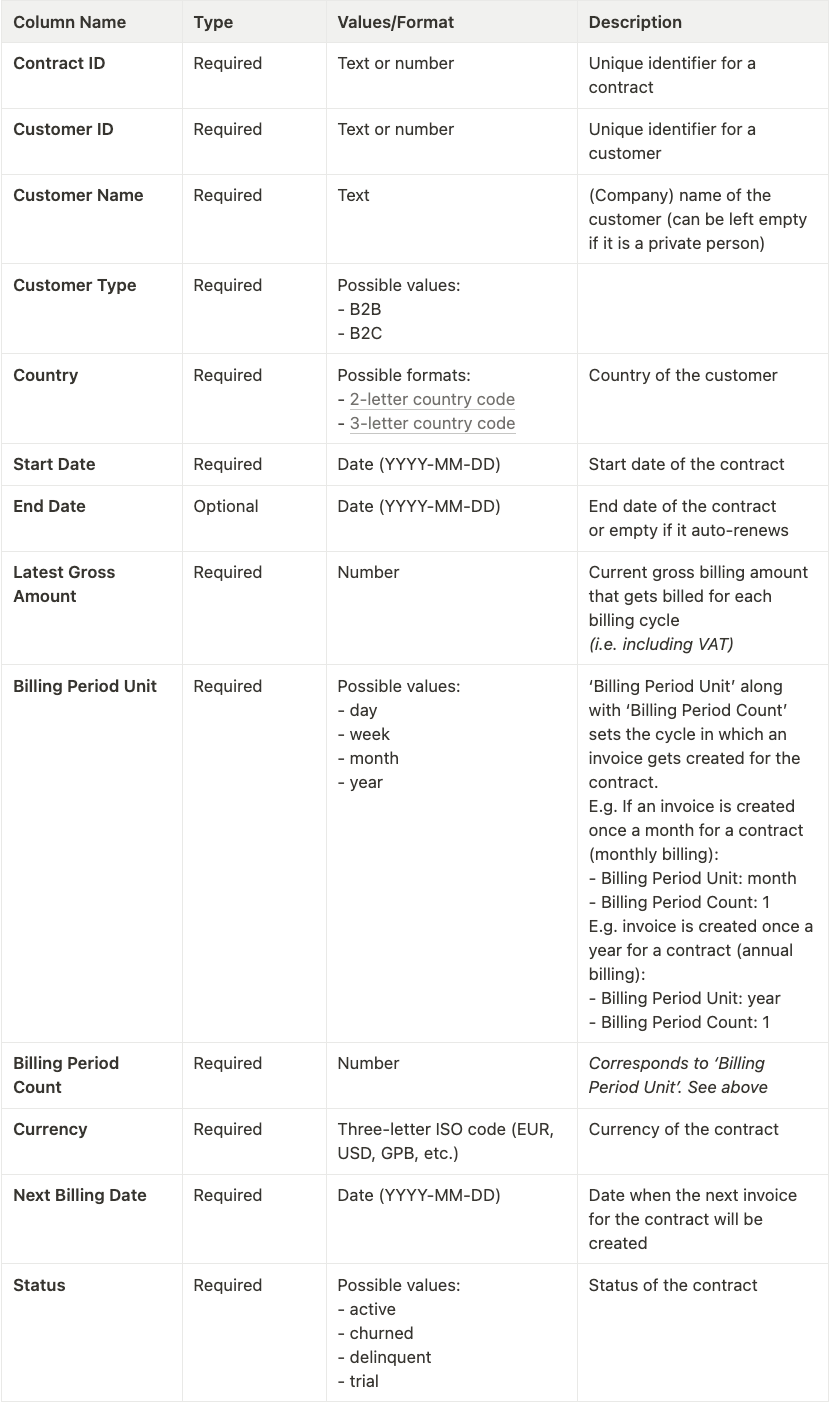
Legacy fields

Uploading your contracts on re:cap
We are aware that the upload can be a bit cumbersome in the beginning. So, if it’s the first time you’re uploading data manually, please book a guidance call with us before.
1. Click on Data and then on Revenue & Customers via the menu on the left.
2. Under Revenue files, click on the Add data manually button.
3. Click now on Import contracts.
4. Here you once again have the option to download our template, which we recommend using.
5. Click on Browse files to select your Excel or CSV file and upload it.
6. Click on Start converting data.
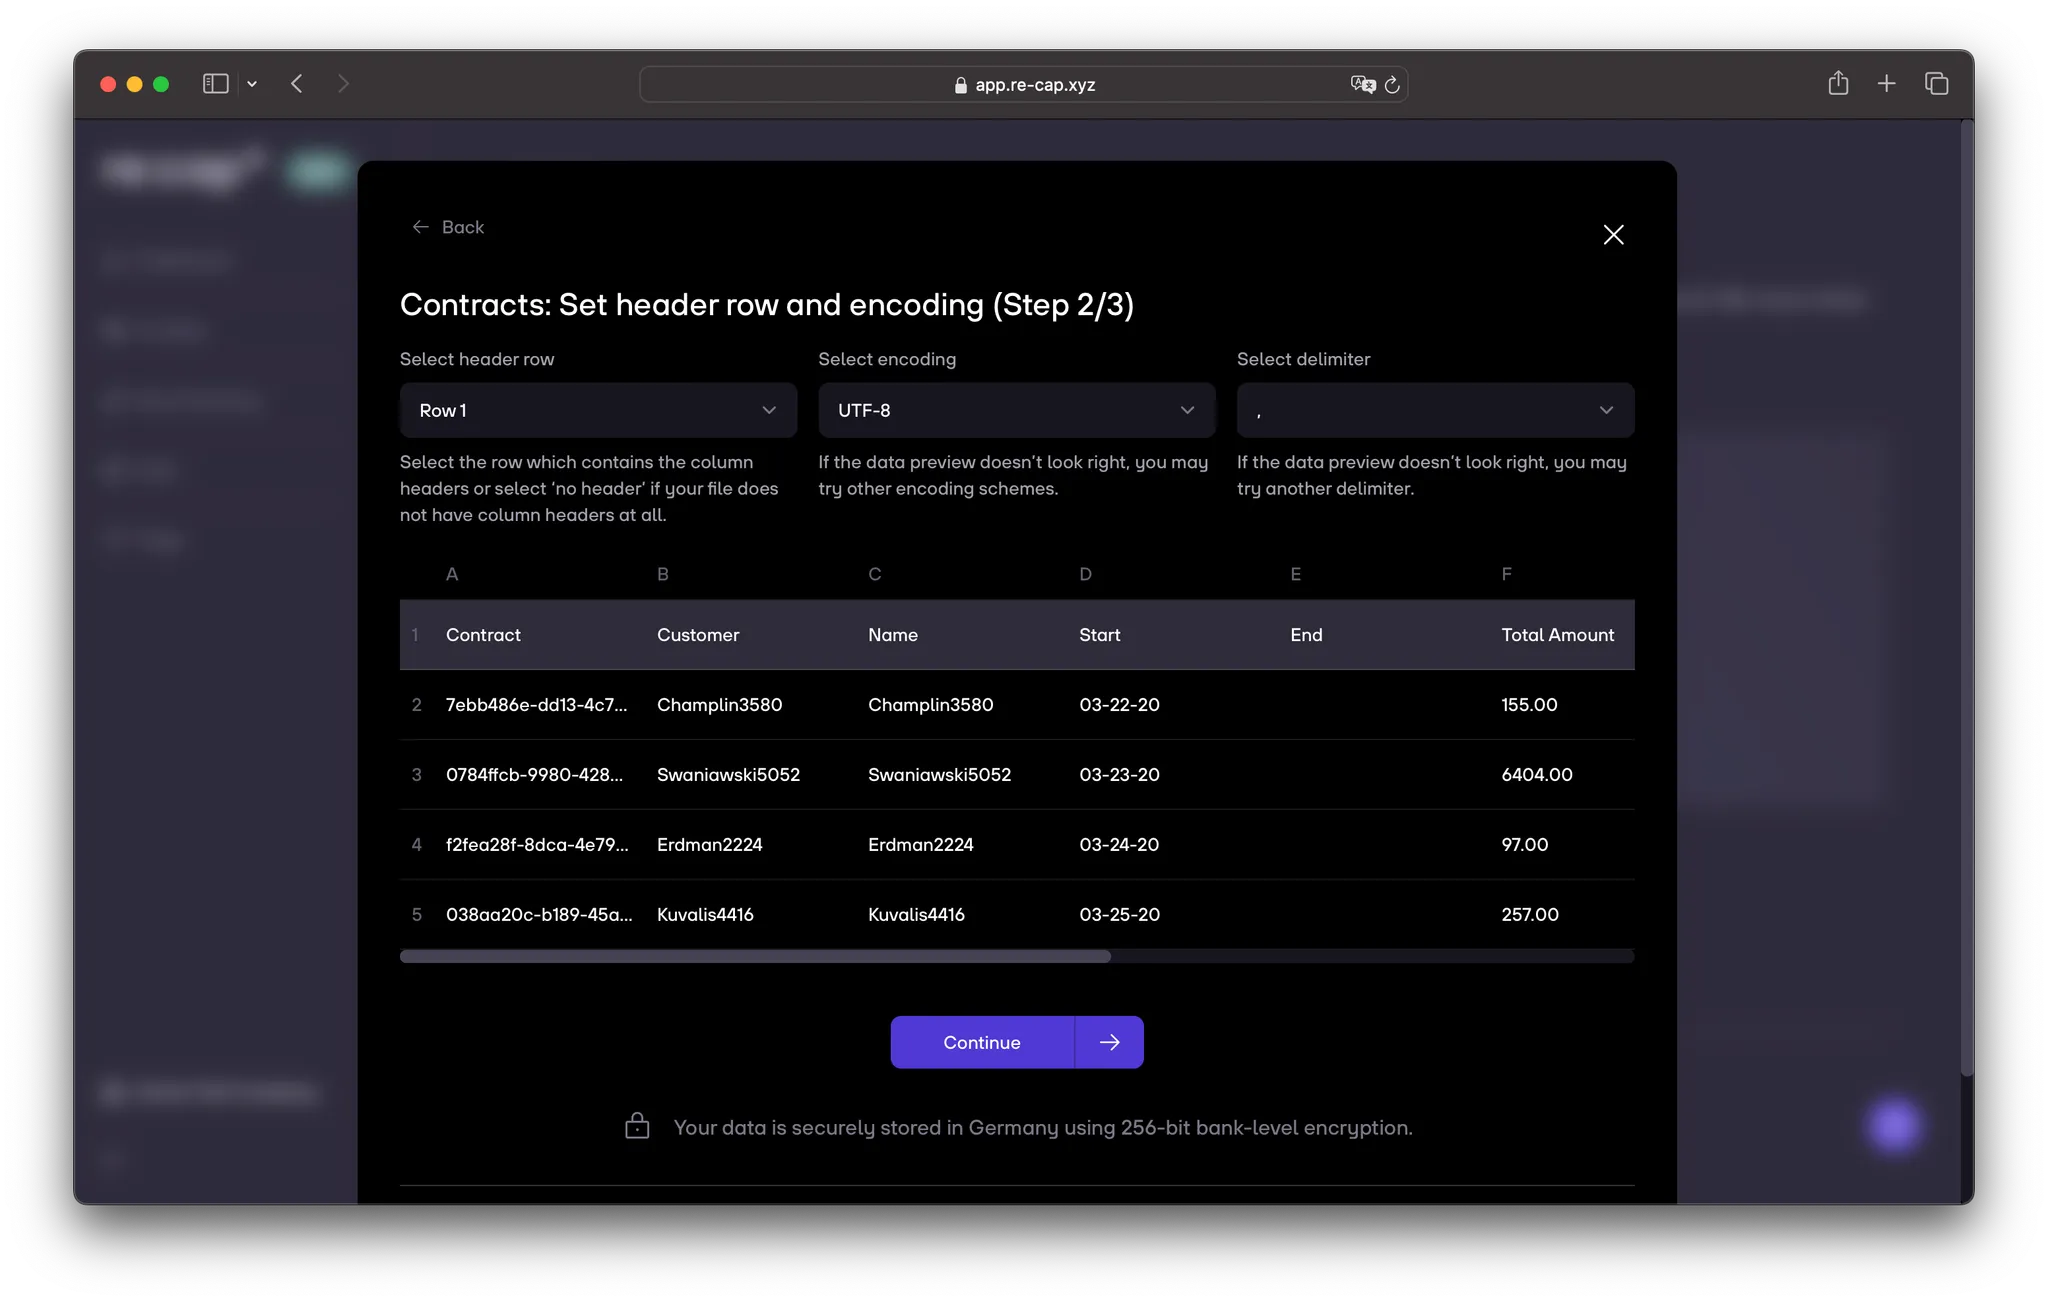
7. The contents of your file will now be visible. Check if they look right, and then click on Continue. If the contents don’t look good you can change the encoding and/or delimiter of your file.
8. Check that everything has matched correctly:
- Green: All good – we’ve found the column and value in your upload.
- Orange: Check required – we’ve think we’ve found a match, but you should check it.
- Red: Work needed – we couldn’t find the column in your data, which might be because:
- The column was not included in your upload → Upload a new file or set static values
- The column name was too different → Select the matching column
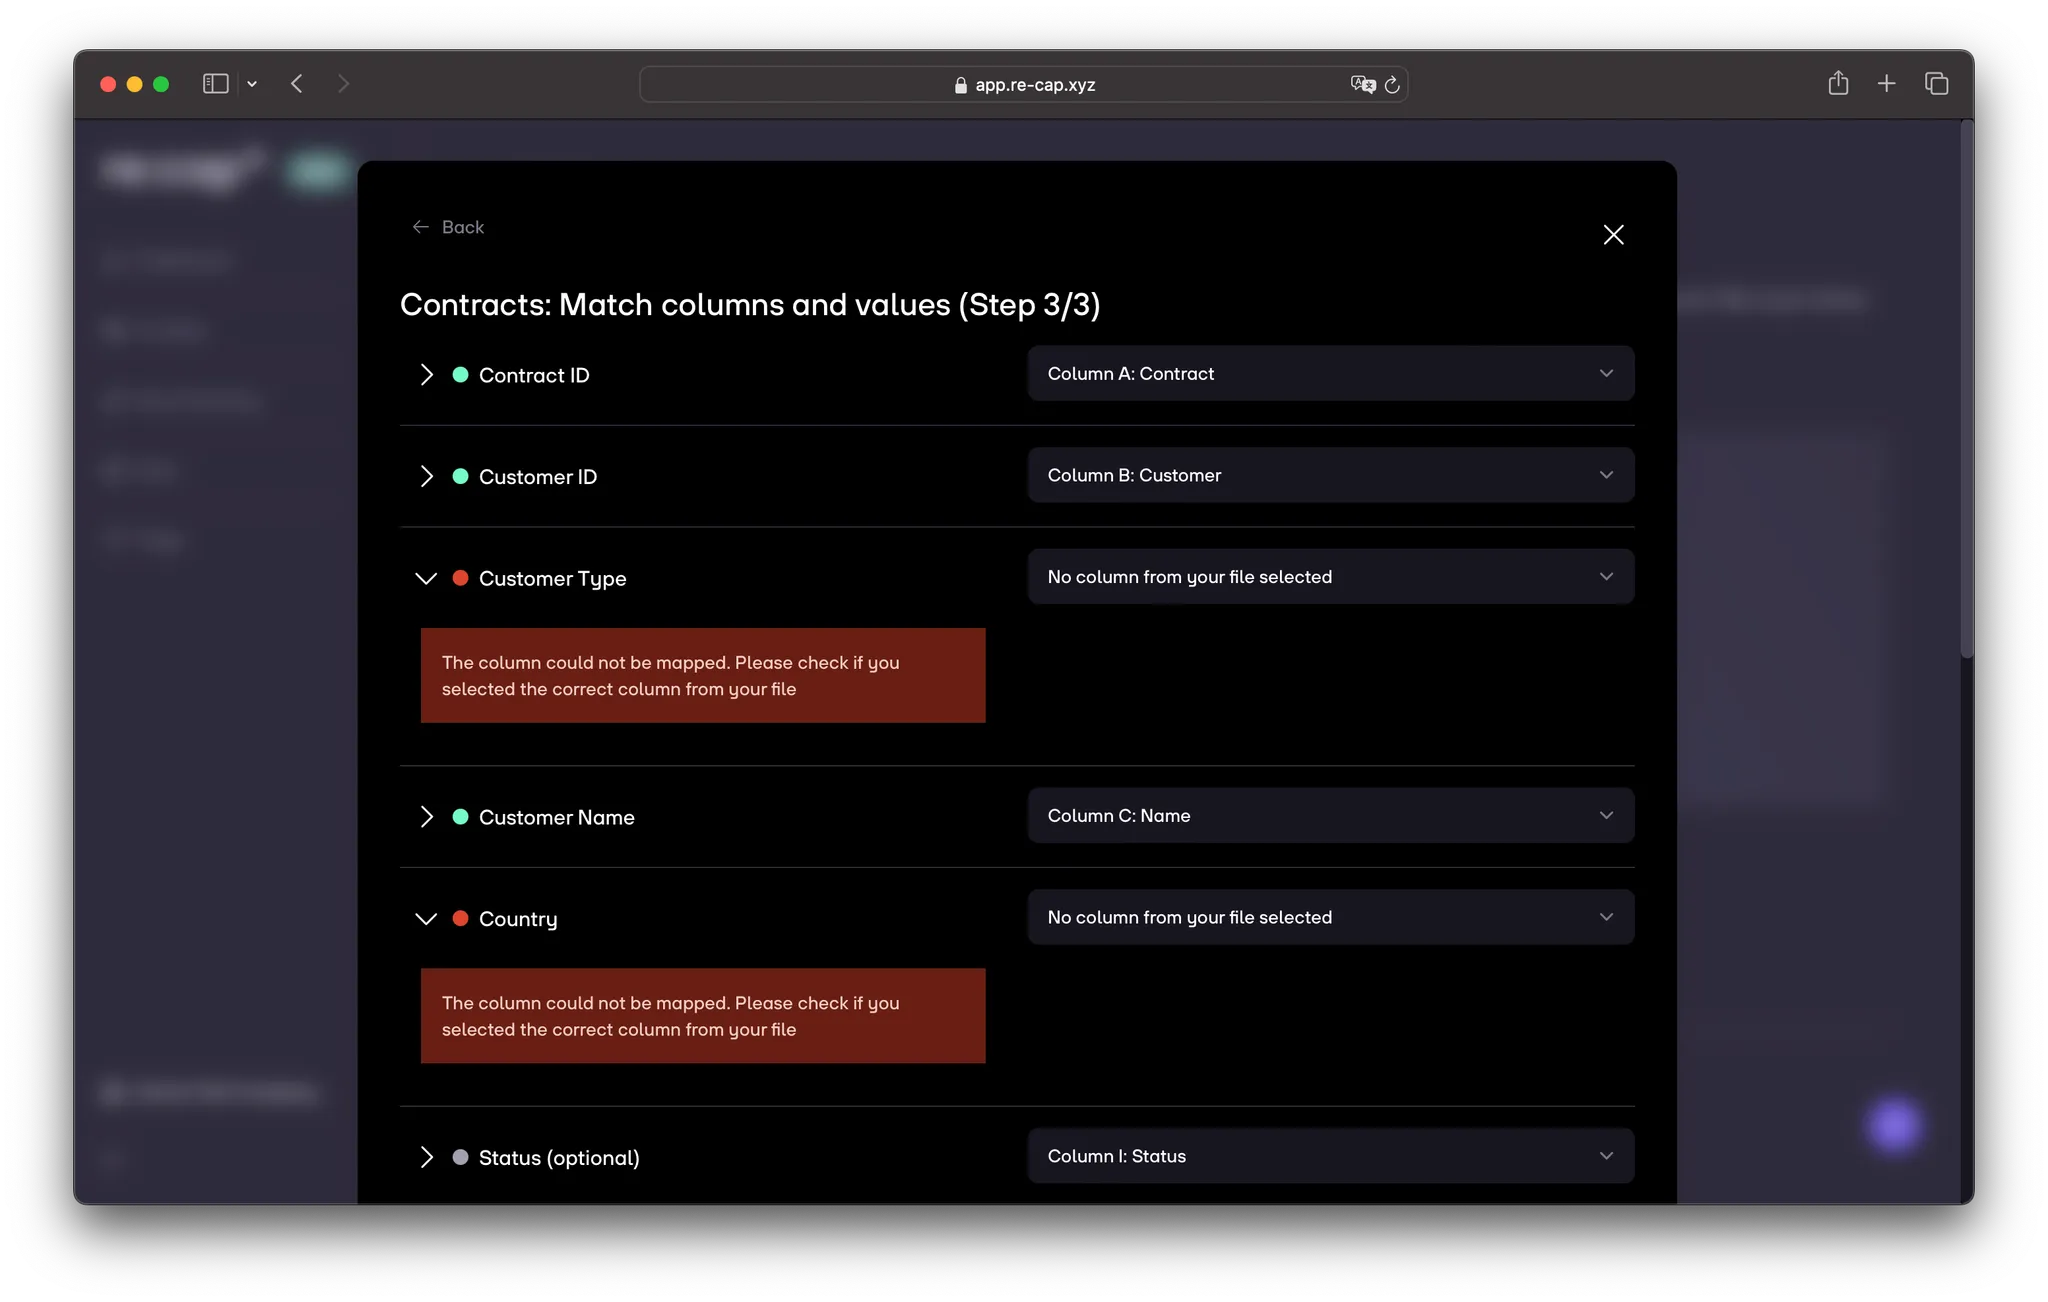
9. When all the columns are successfully matched, you can click on Continue.
10. Review your data once again the last step, and then click on Confirm.
Manual invoice upload
Preparing your manual invoices upload
Note: To avoid errors during the upload process, please click here and use our Excel template.
This file needs to include all invoices for the minimum period of the last two years.
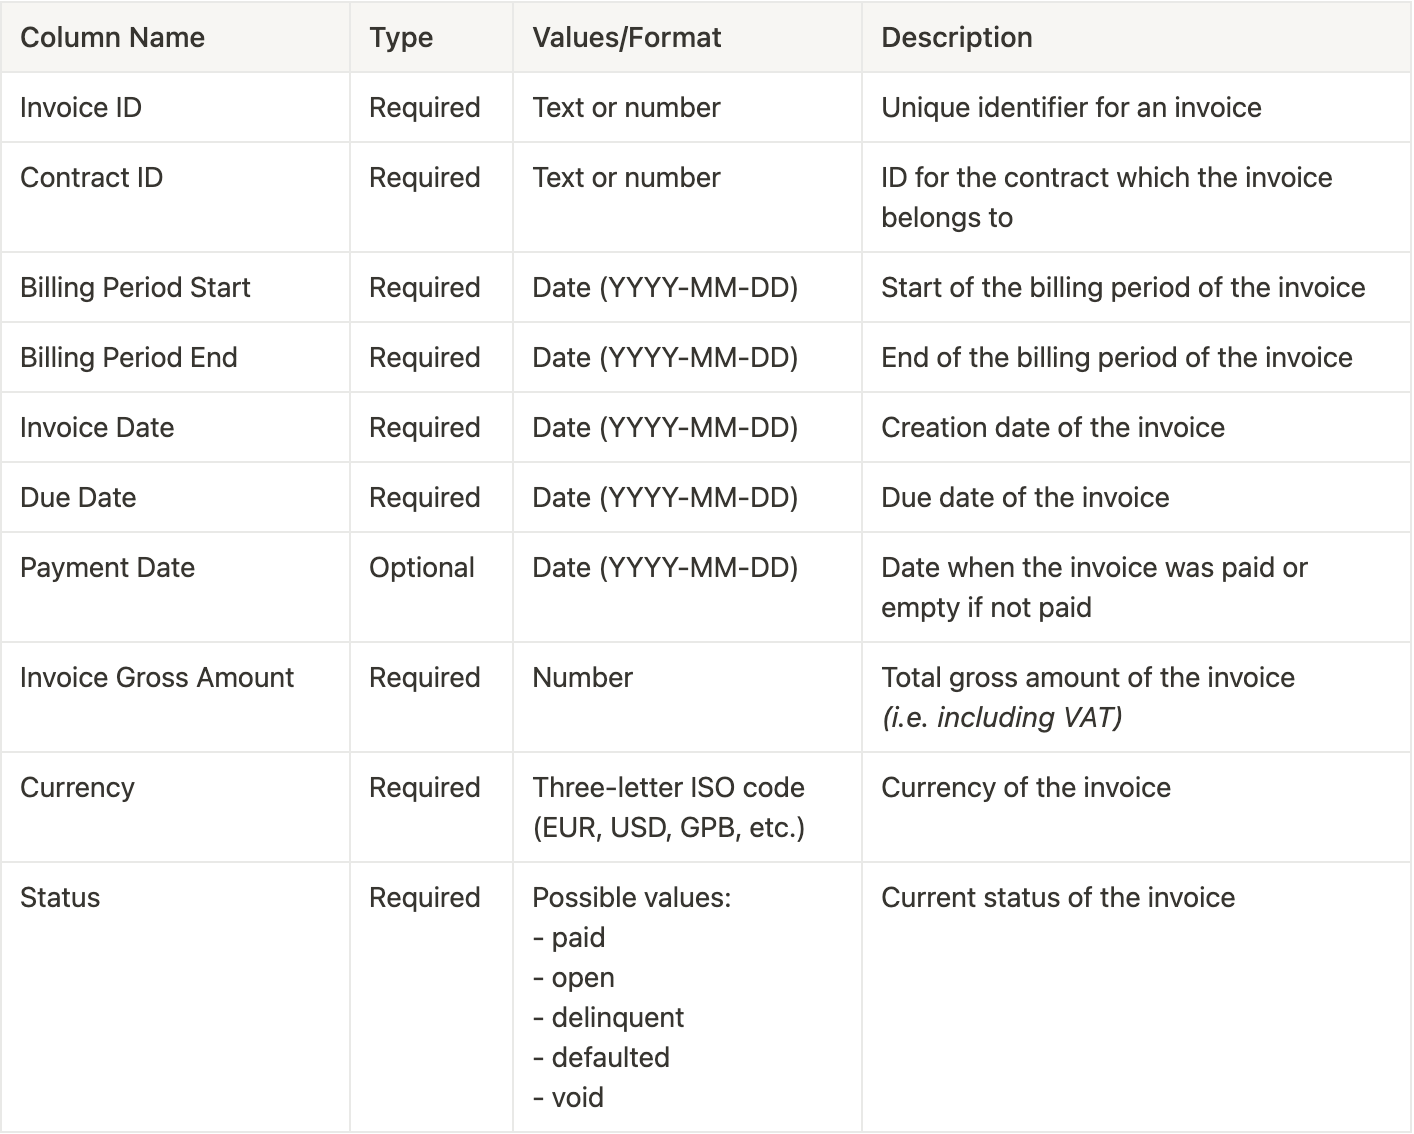
Avoid these common mistakes for a successful manual upload:
- Incorrect billing cycles: when entering a contract’s billing cycle, make sure it represents how often your client receives an invoice from you. For example, if a subscription is signed for one year and the customer is billed on a monthly basis, then the contract has a monthly billing cycle.
- Incorrect contract gross amounts: a common mistake is entering a contract’s gross amount that does not correspond to its billing cycle. For example, if a customer is billed on a monthly basis, the gross amount should be the amount the customer is billed each month. An annually billed contract should have its annually billed gross amount entered.
- Not including matching ContractID in the contract and invoice data: our analysis requires that invoices are matched to contracts, so that MRR, growth, churn and delinquencies can be tracked down to individual contracts. Without matching invoices and contracts, no contract can be traded.
- Including duplicate InvoiceIDs: invoiceIDs are how we differentiate Invoices with similar attributes. Invoices with a duplicate InvoiceID cause miscalculations and will most likely lead to less favourable financing terms.
- Not including churned subscriptions: churned customers are an important part of our analysis and must be included in the subscription data. If churned customers aren’t included in the subscription data from the beginning, our AI will detect the mismatch between the MRR in the financial statements and the subscription data provided potentially delaying when you receive an offer from re:cap.
Uploading your invoices in the app
1. Click on the Add data manually button again.
2. Click now on Import invoices.
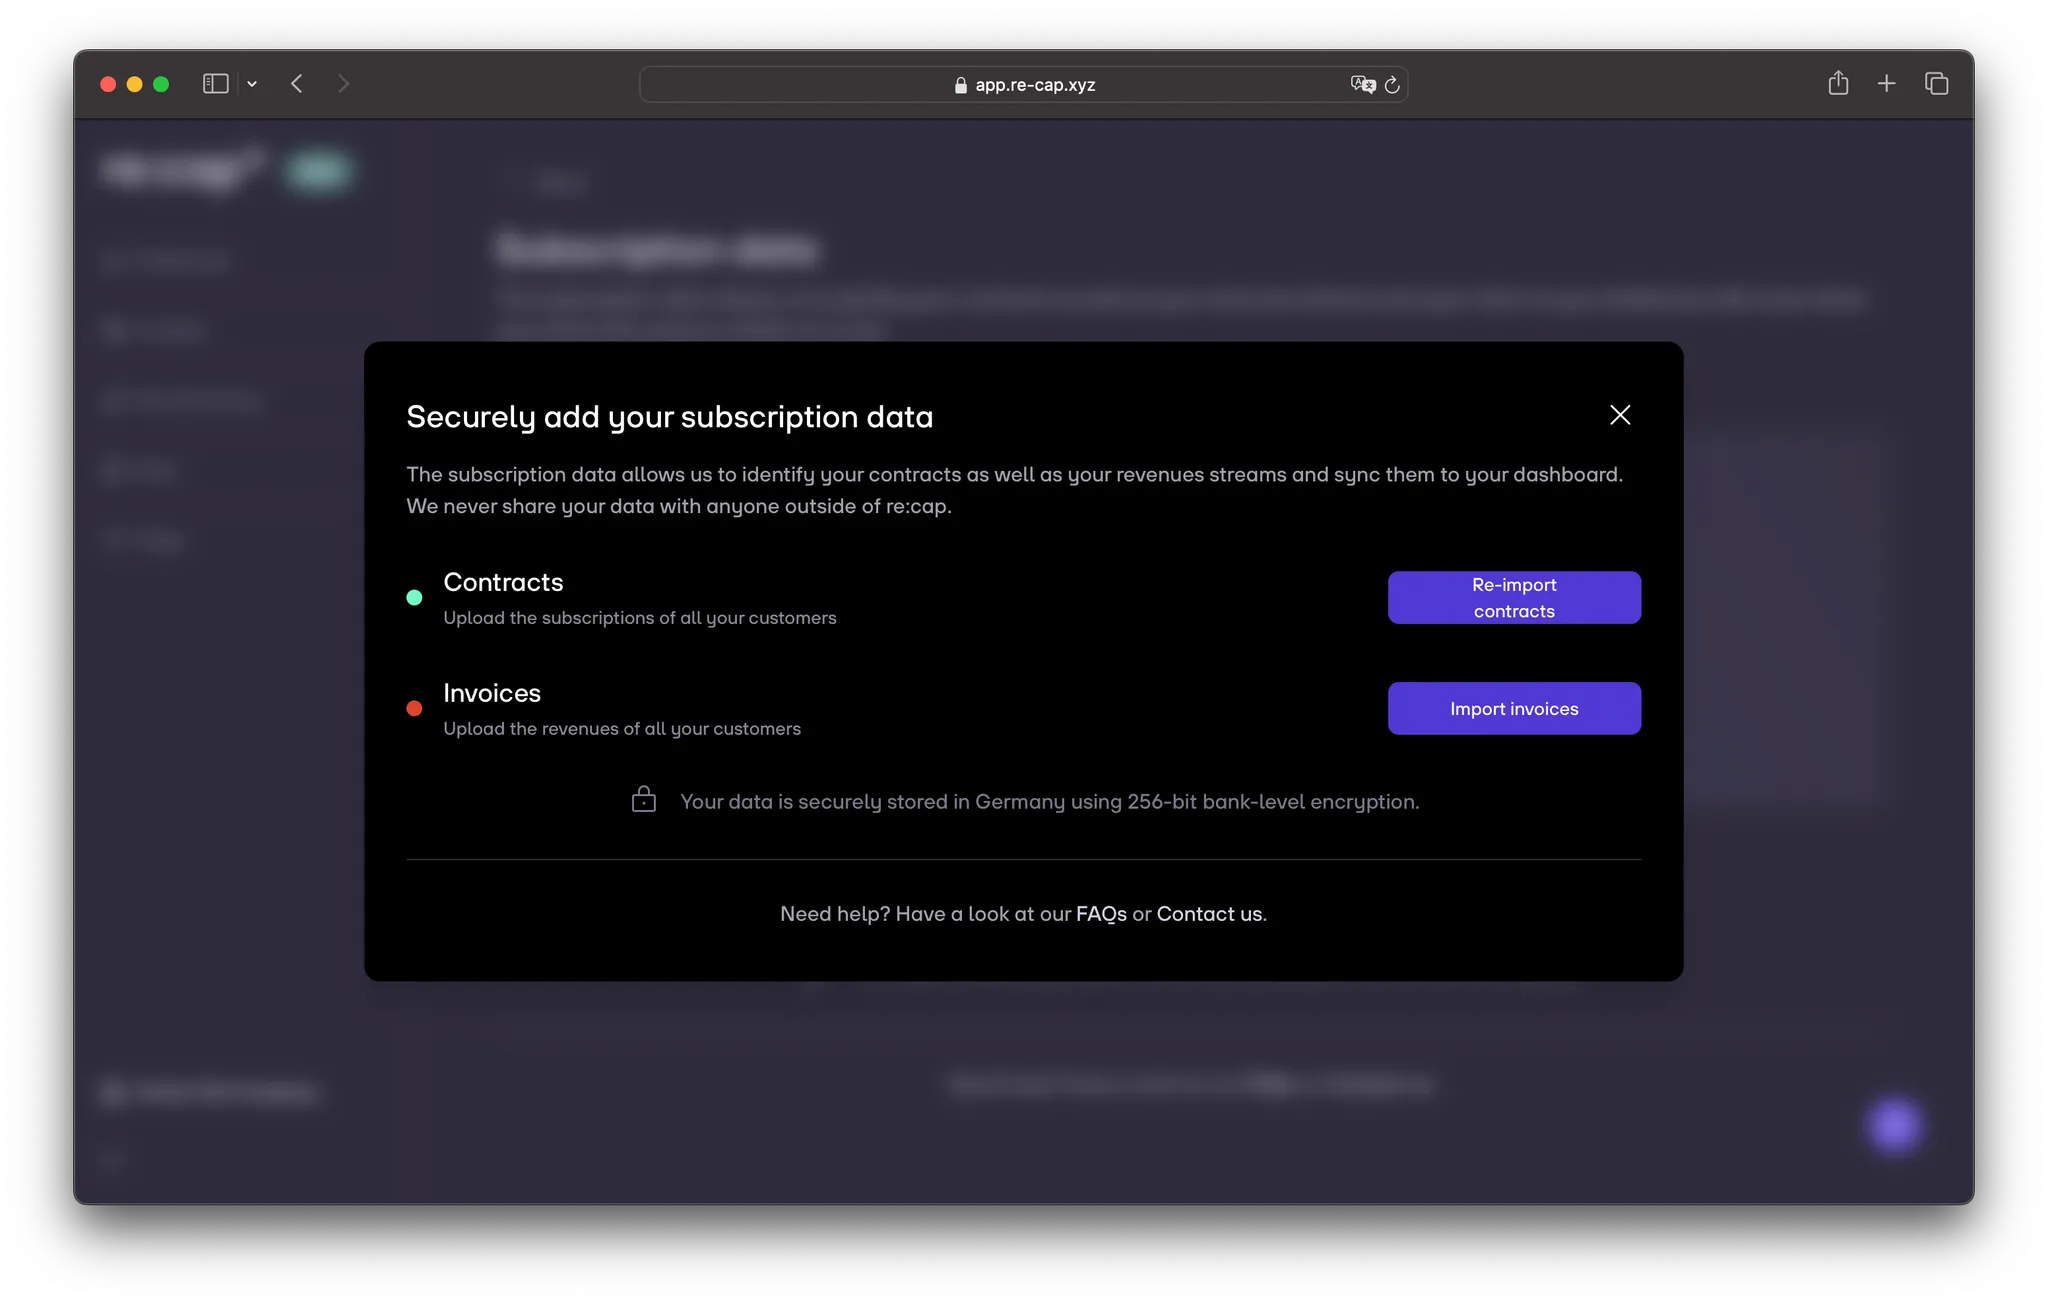
3. Here you once again have the option to download our template, which we recommend using.
4. Click on Browse files to select your Excel or CSV file and upload it.
5. Click on Start converting data.
6. The contents of your file will now be visible. Check if they look right, and then click on Continue. If the contents don’t look good you can change the encoding and/or delimiter of your file.

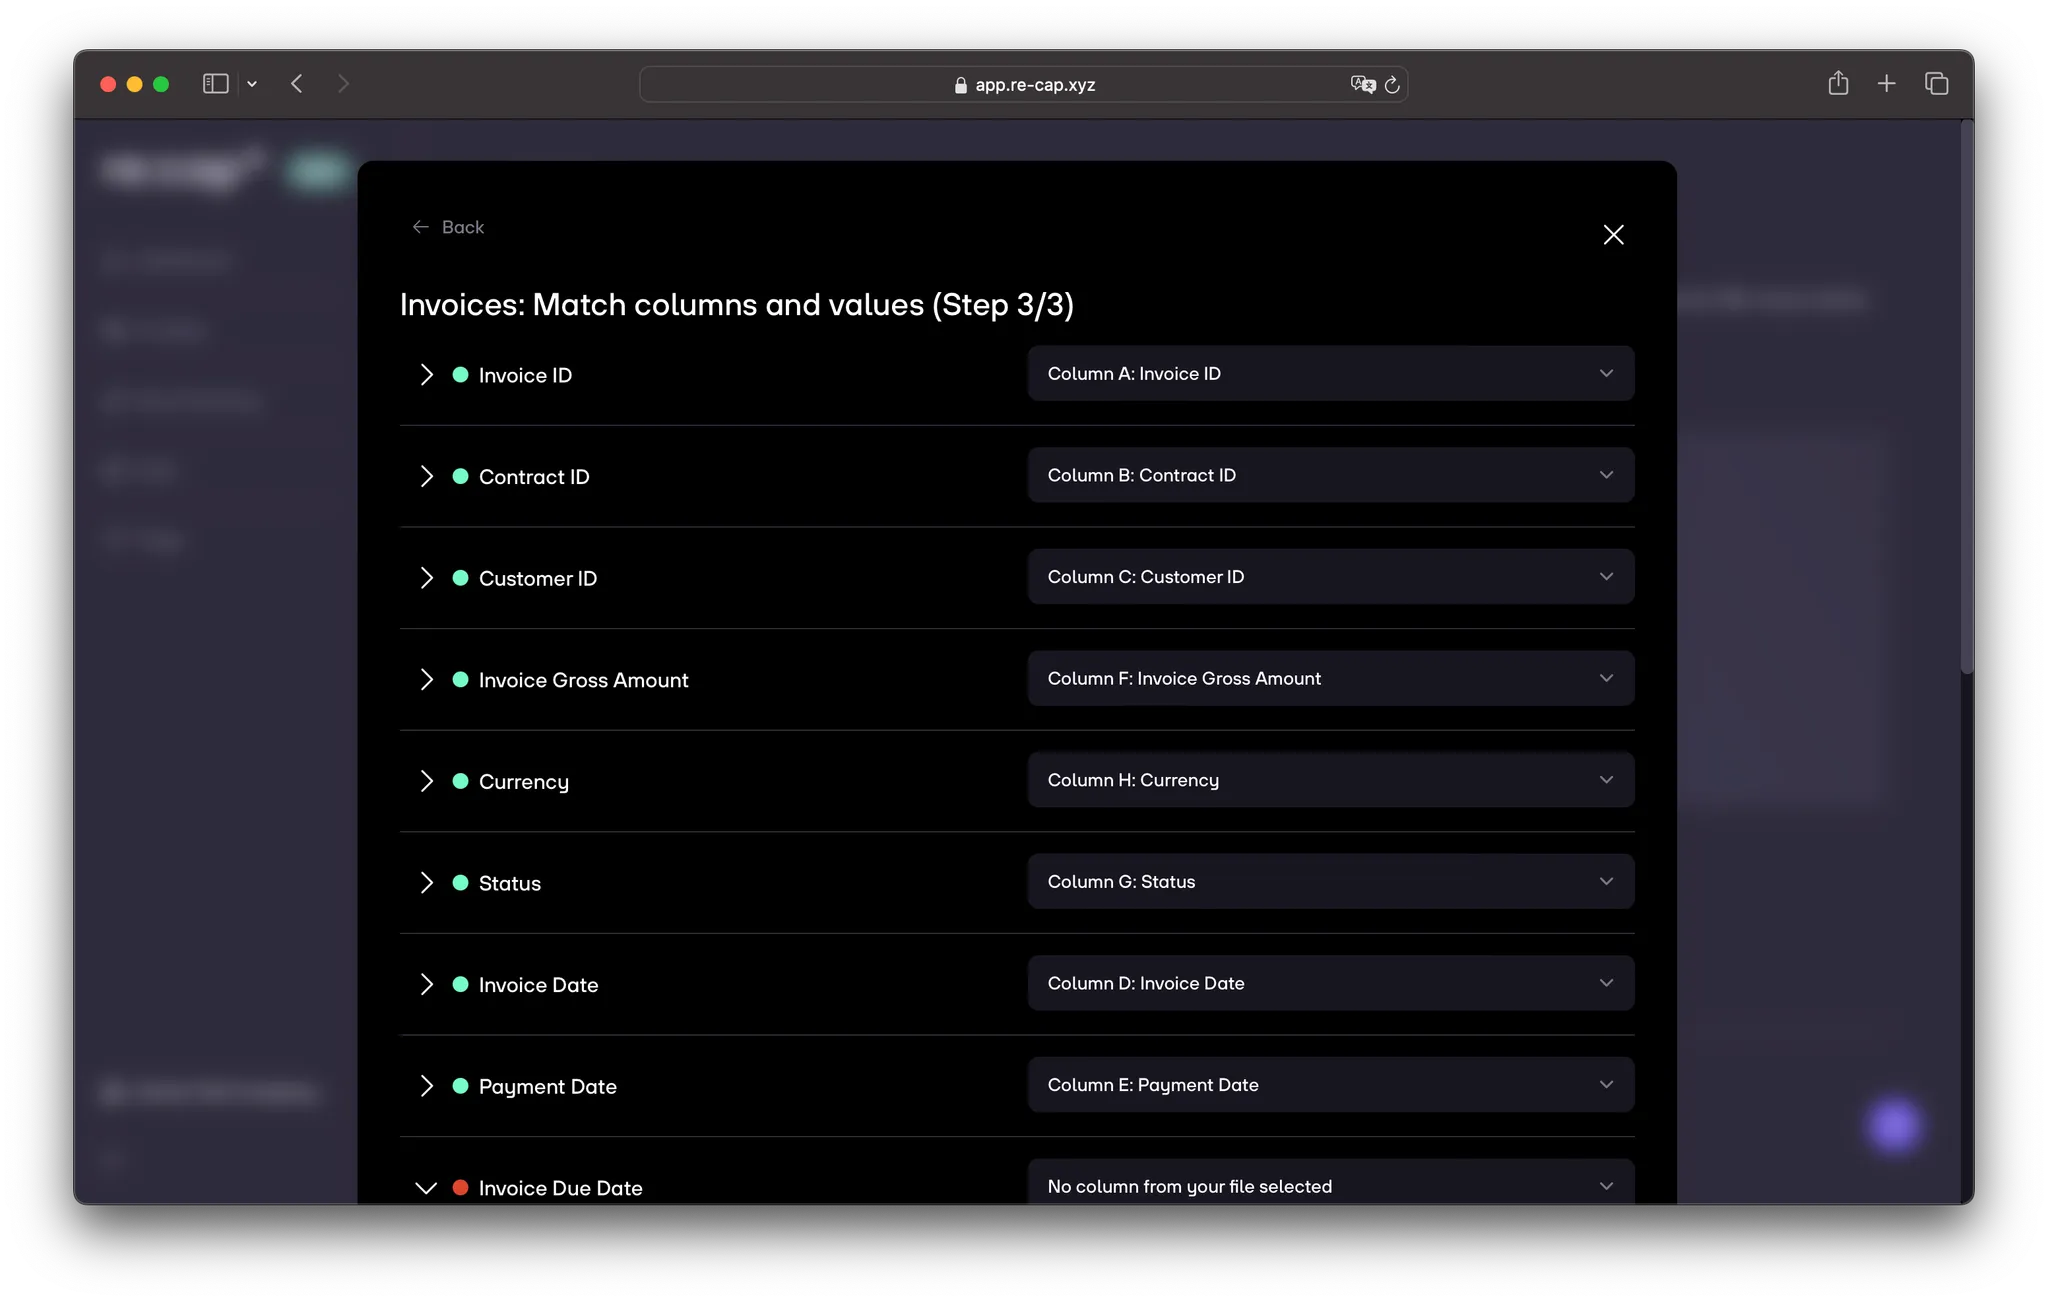
7. Check that everything has matched correctly:
- Green: All good – we’ve found the column and value in your upload.
- Orange: Check required – we’ve think we’ve found a match, but you should check it.
- Red: Work needed – we couldn’t find the column in your data, which might be because:
- The column was not included in your upload → Upload a new file or set static values
- The column name was too different → Select the matching column
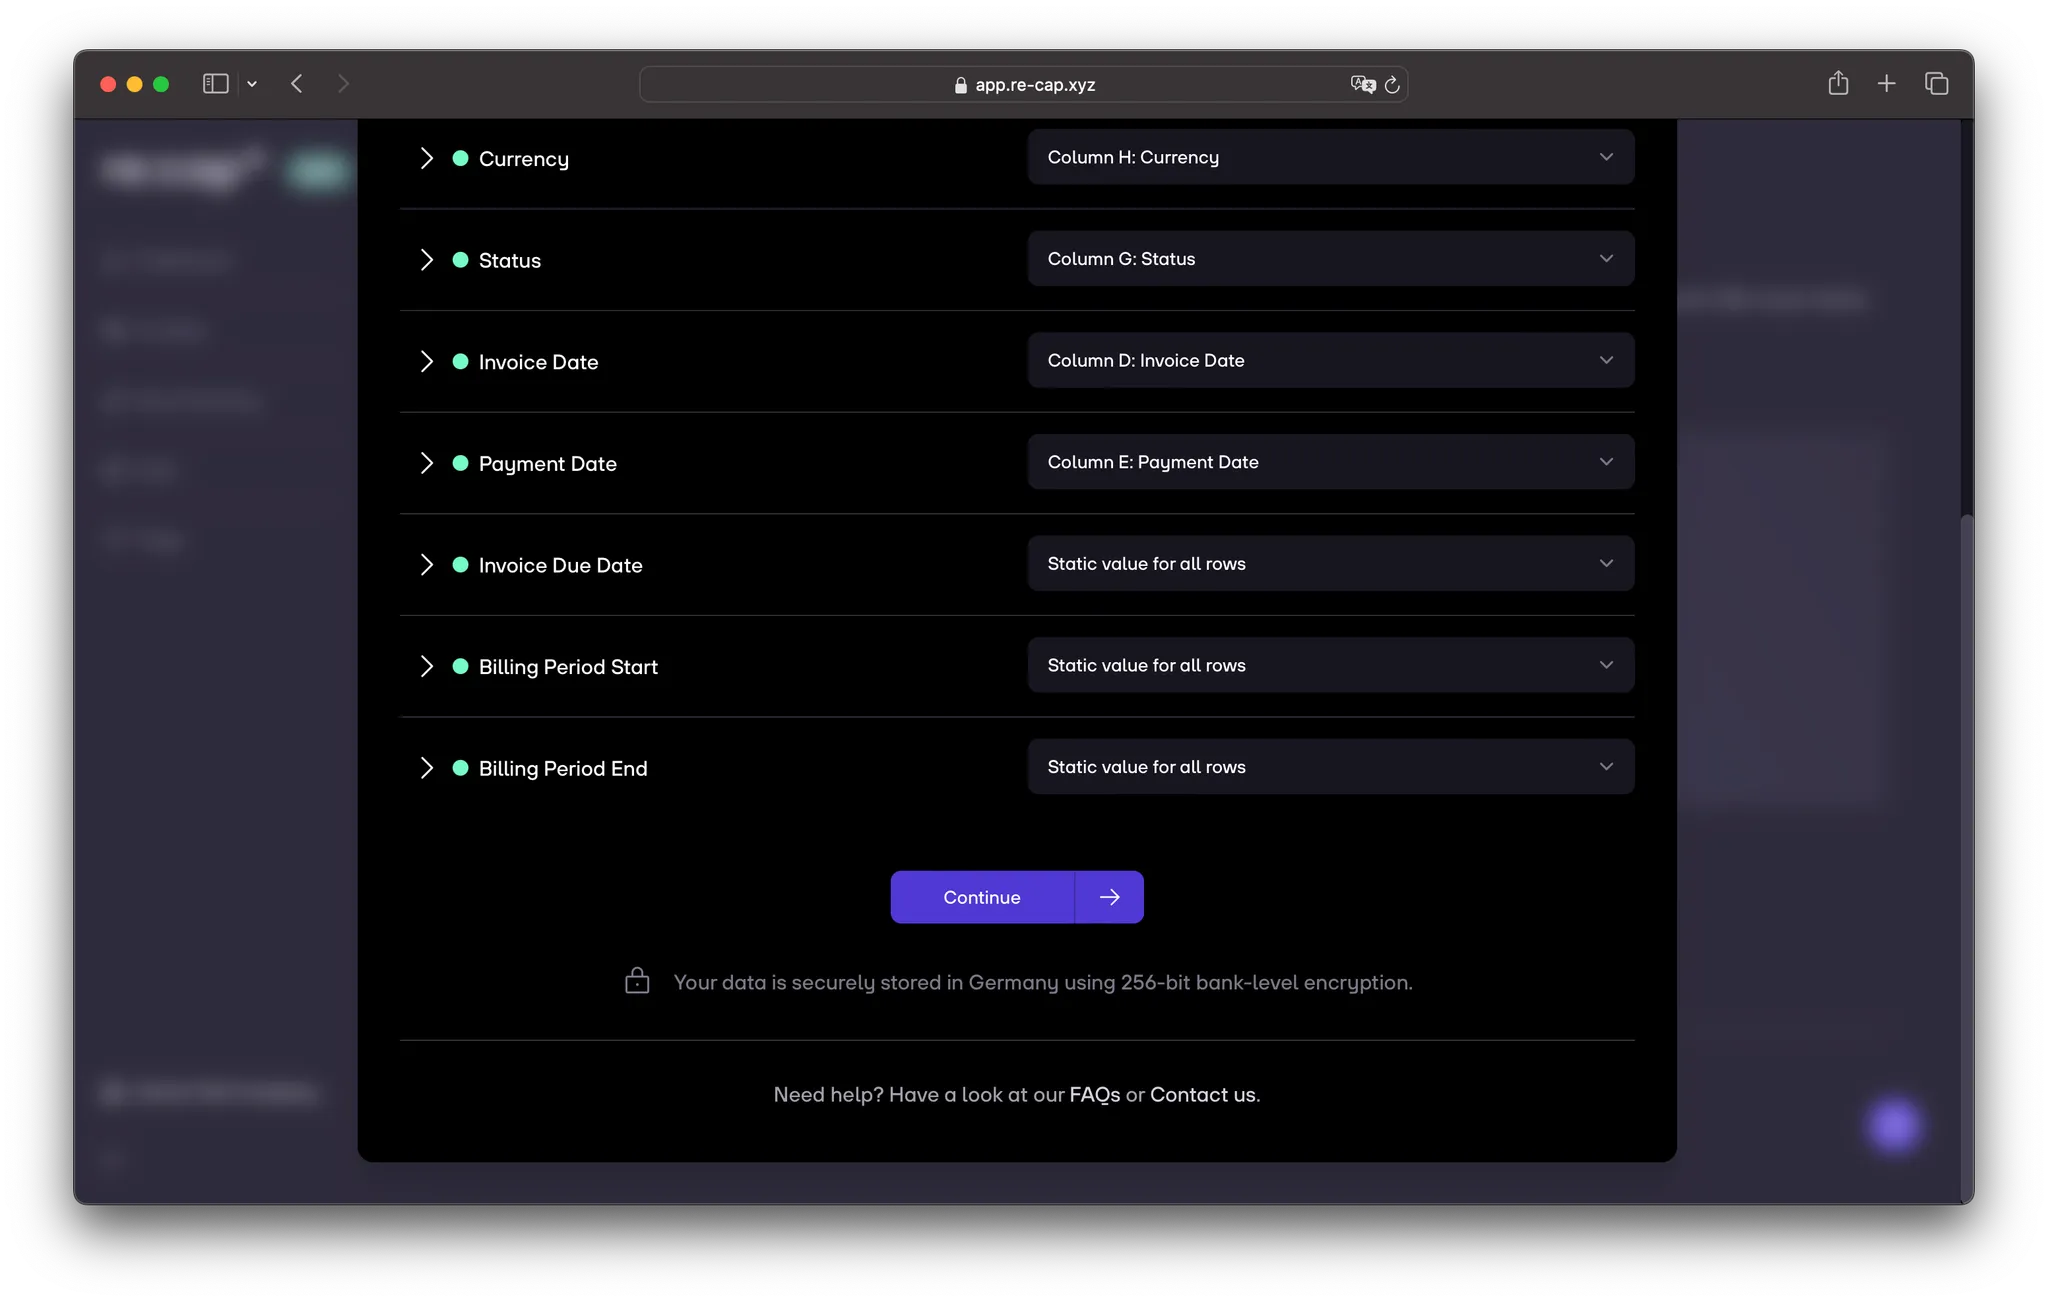
8. When all the columns are successfully matched, you can click on Continue.
9. Review your data once again the last step, and then click on Confirm.
.svg.png)

.gif)


