You can switch between a consolidated and custom view on your Liquidity dashboard. Simply select the bank accounts you want to include to create different cash views.
Some examples you can use the custom view to filter by are:
- Entities, e.g. you have multiple entities and want to see a break down in addition the the consolidated view
- Countries, e.g. you don’t want to see the cash flows of your Spanish subsidiary in the consolidated view
- Currencies, e.g. you want one view for all bank accounts in € and one with all bank accounts in $
- Company types, e.g. operating vs. financing entities
Step-by-step: how does it work?
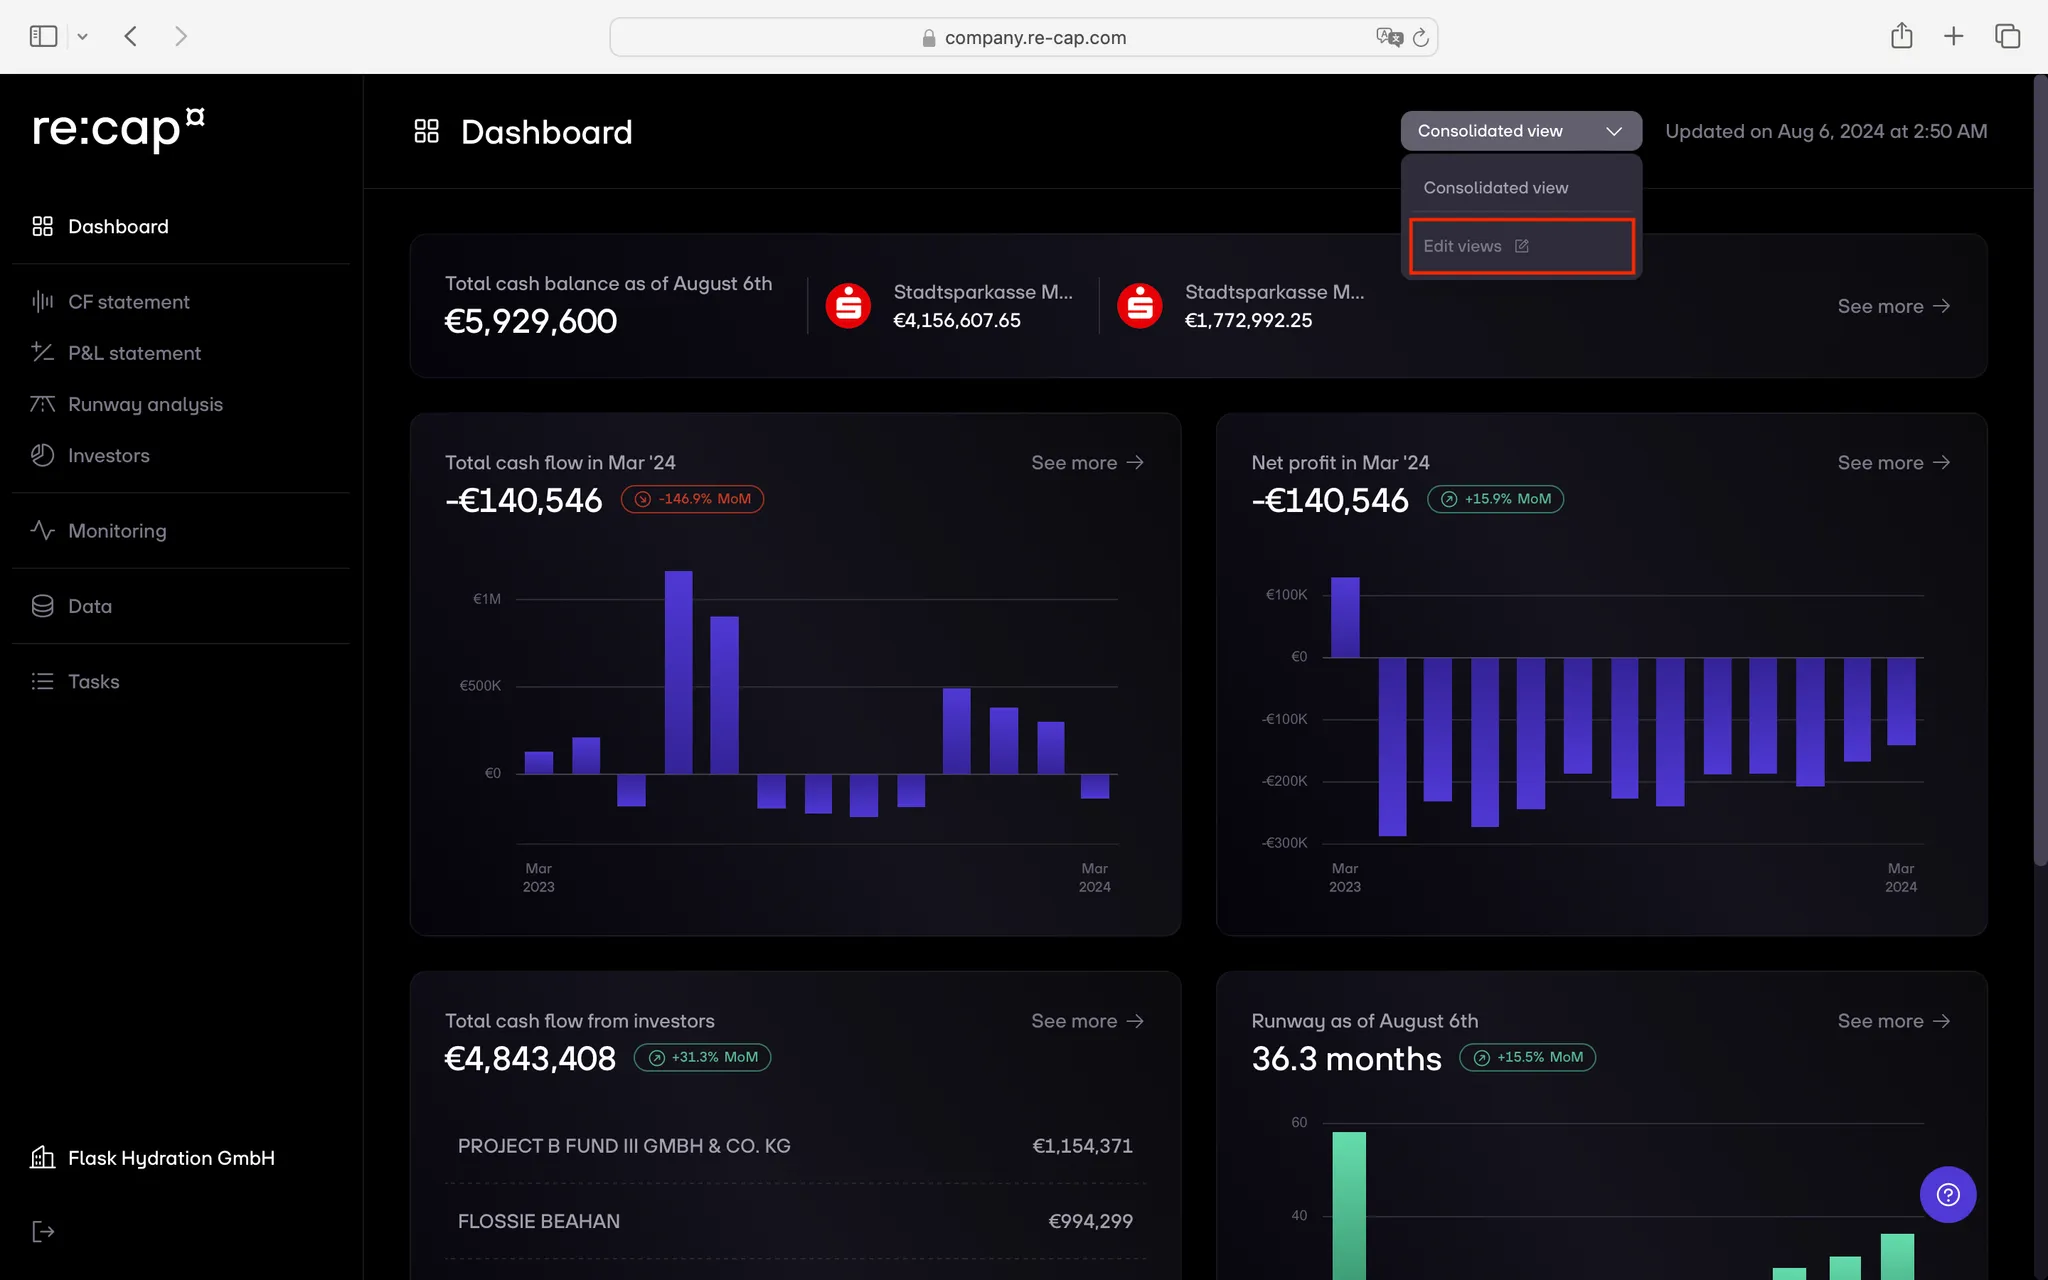
1. Go to your Dashboard via the navigation menu, and click on Consolidated View on the top right hand side of the screen.
2. Select Edit views.

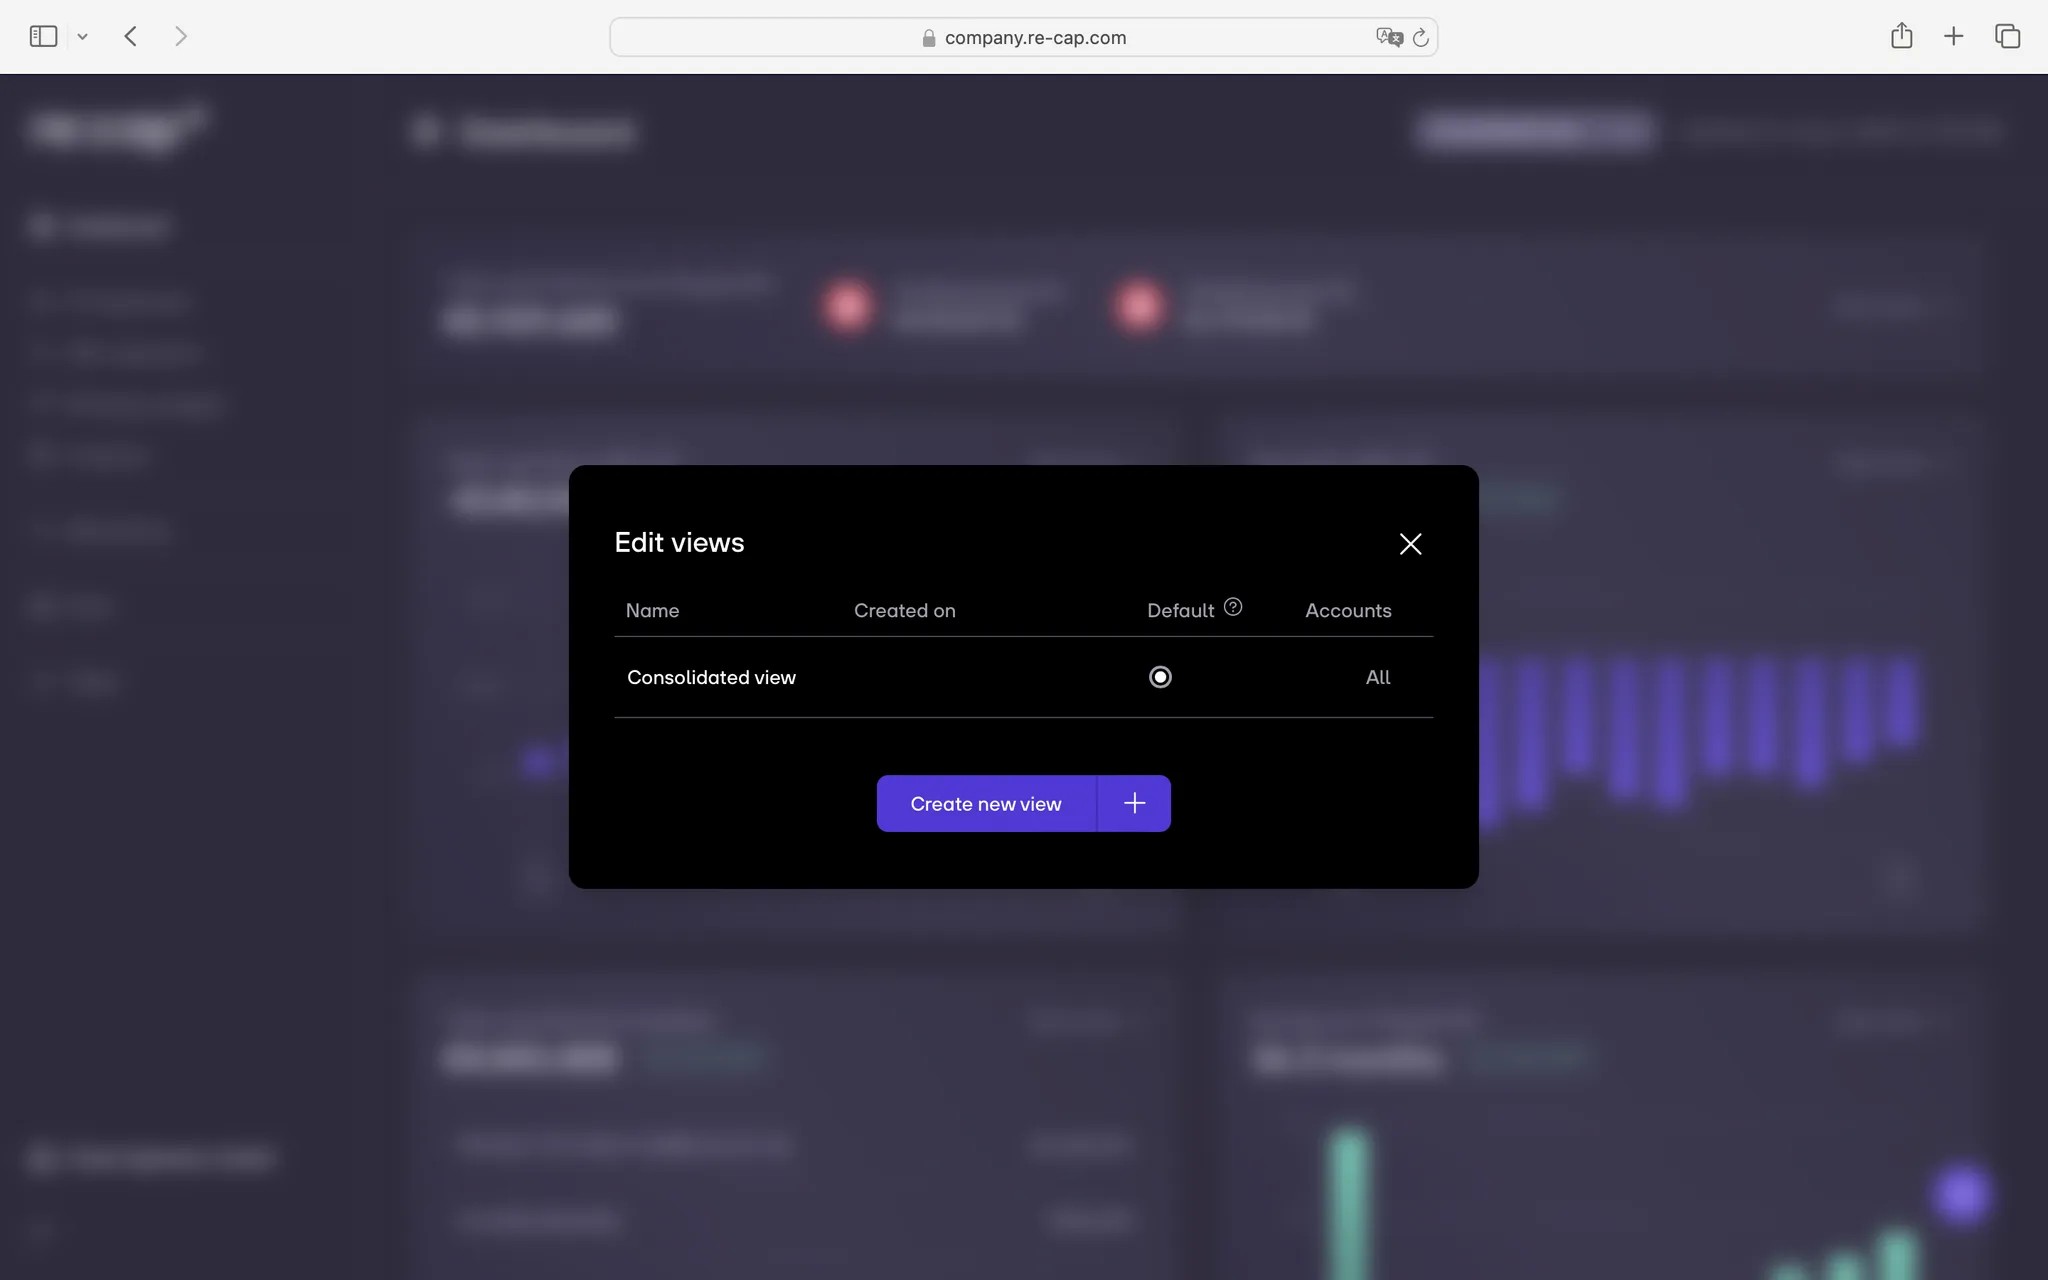
3. A modal will open. Click on Create new view.

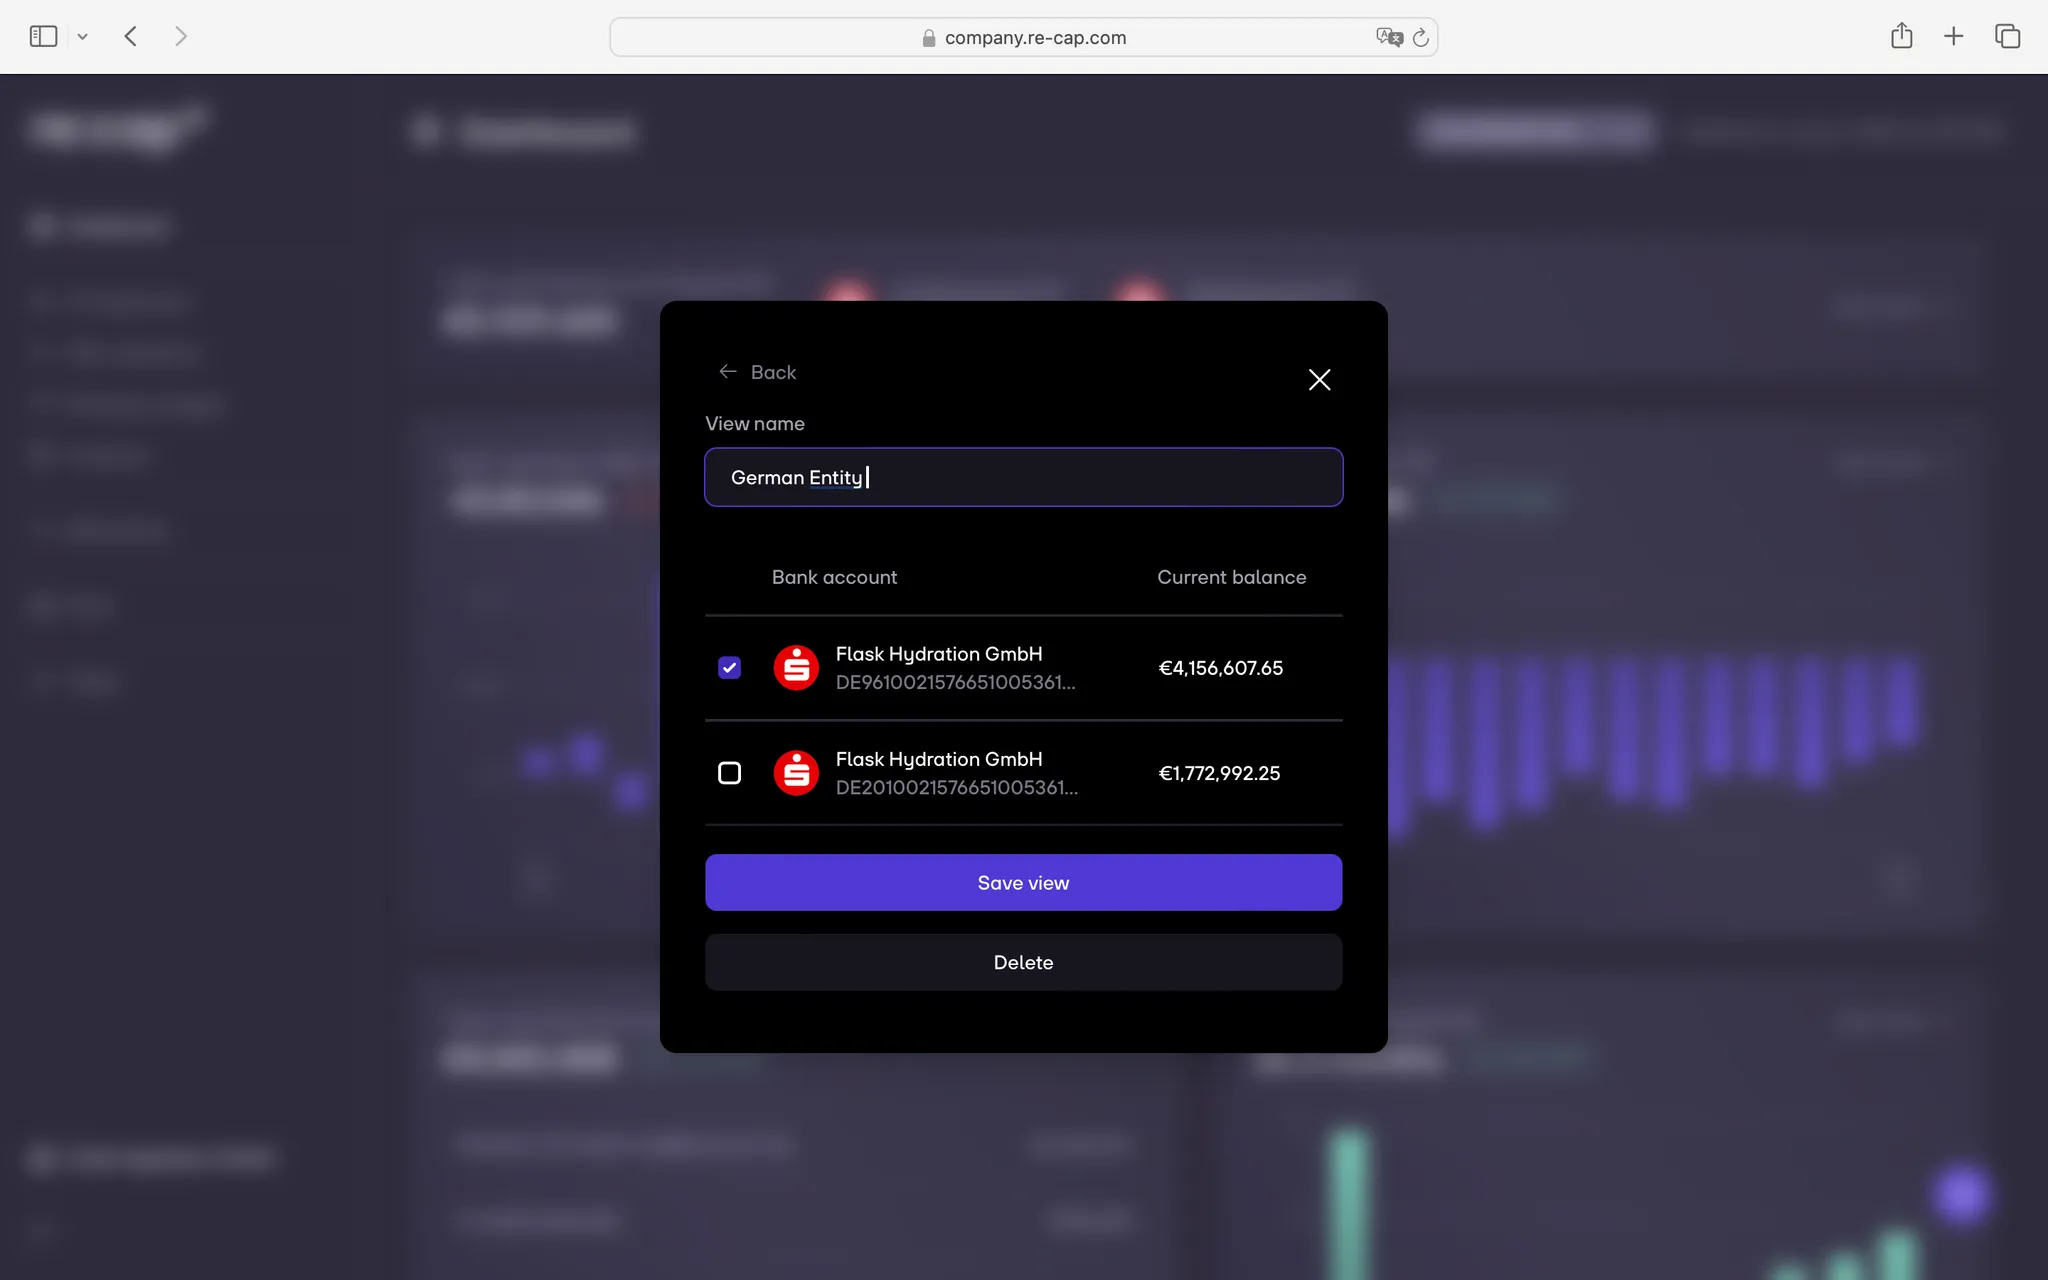
4. Select one or multiple bank accounts that you want included in this view. Give your view a name and click on Save view.

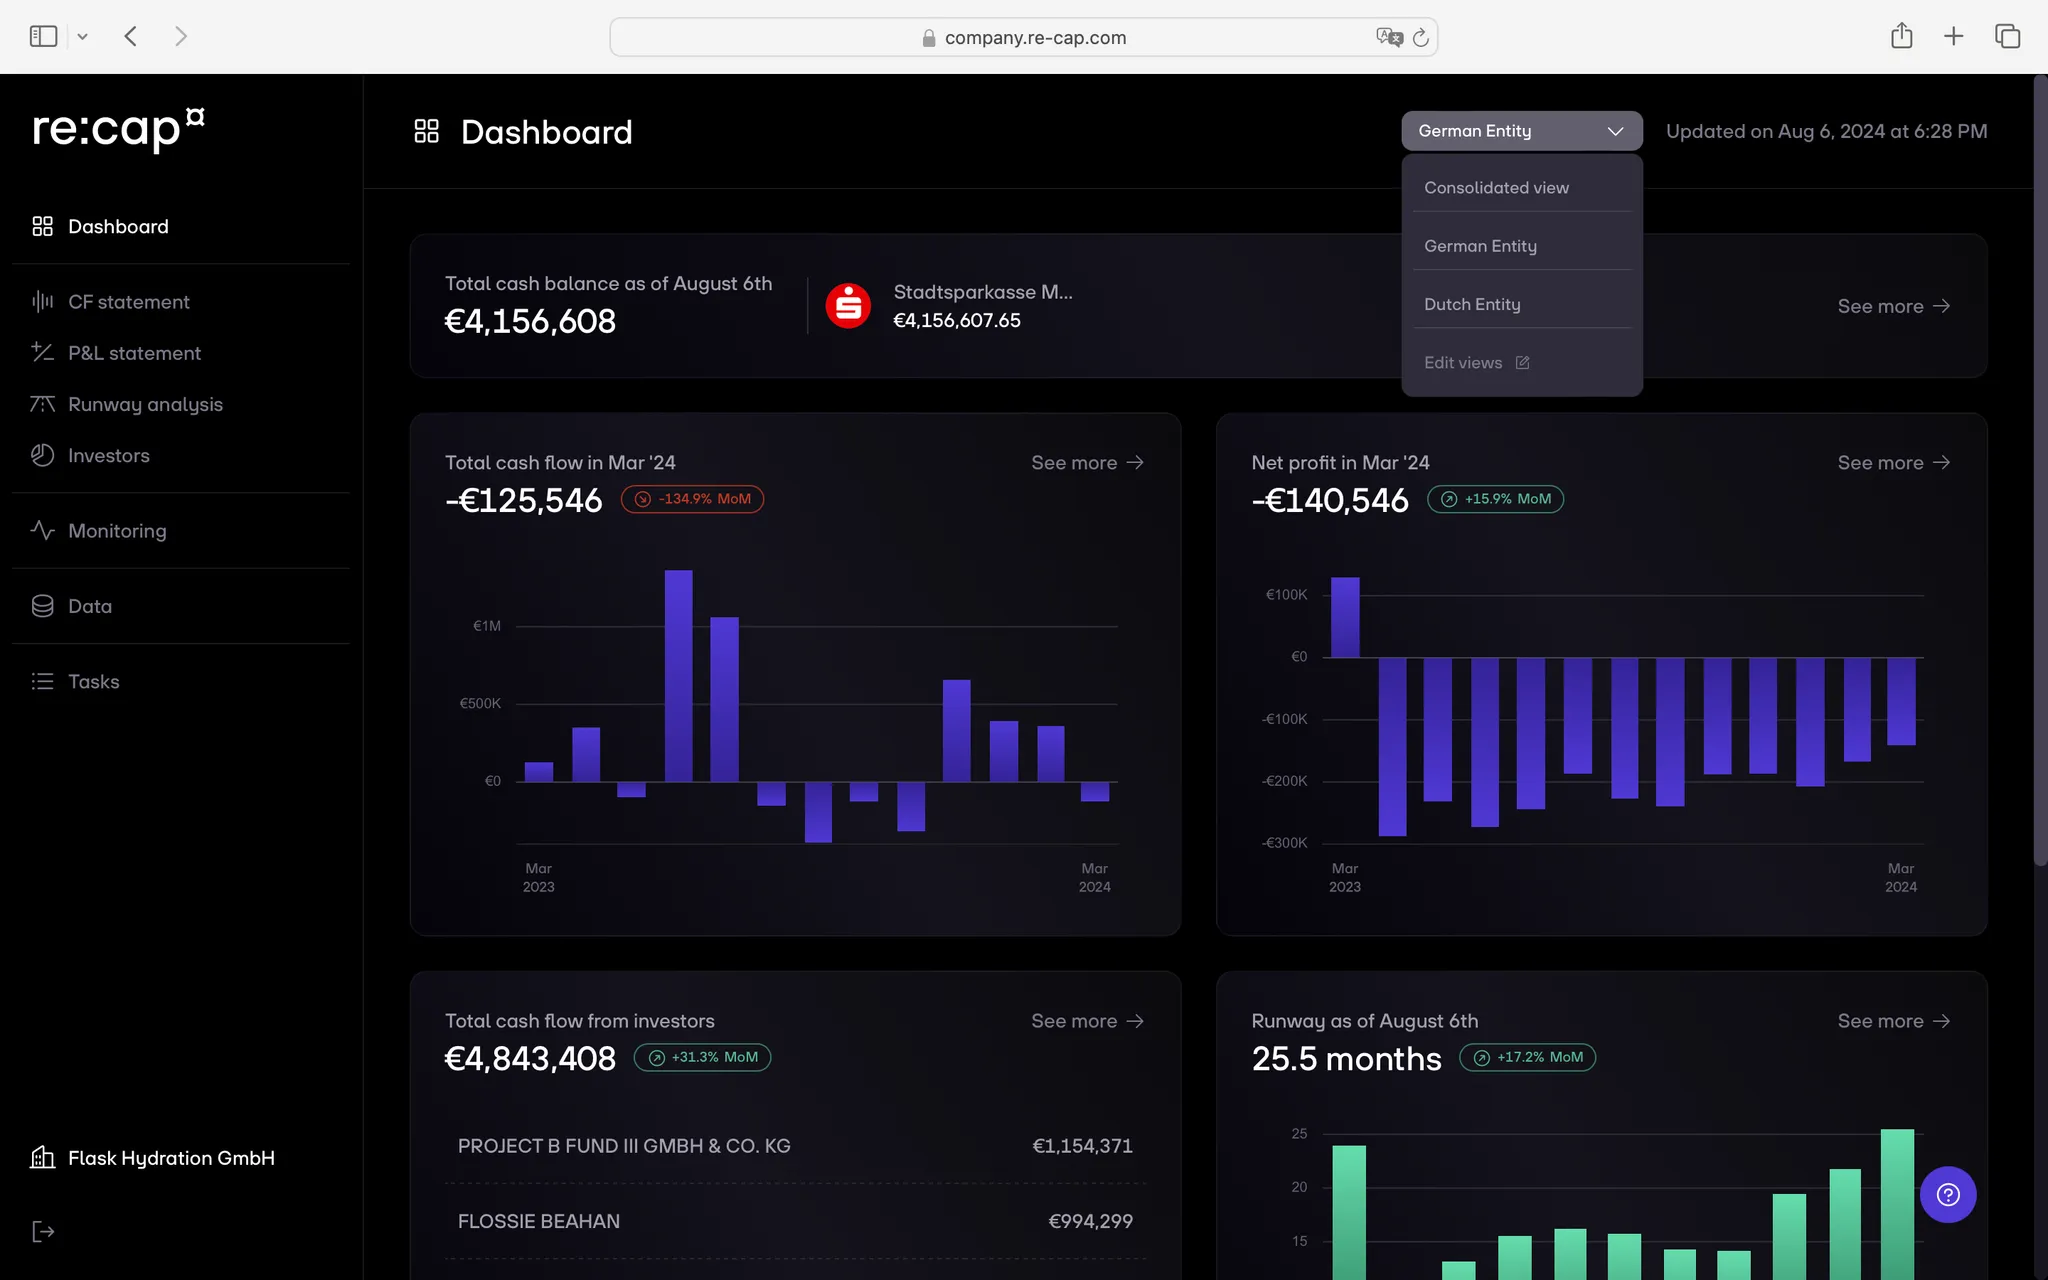
5. Once done, close the modal and select your new consolidated view in the Liquidity dashboard.

Note: You can create as many views as you like, and even set a default one. You can also edit or delete views using the same steps.
.svg.png)

.gif)


